Integrate the Widget - OLD
To maximize the use of QuadPay and Average Order Values, we recommend adding the QuadPay widget to the Product Details Page, Cart, and Mini Cart.
Before You Start
These instructions are for a Shopify store using one of the default Shopify or lightly customized themes. If the store's theme is heavily customized, you may have to add the below snippets to different templates and files.
For additional integration support:
- Watch the video demonstrating an integration
- Or, email us
If you are looking to adjust a currently existing integration, you may want to refer to the instructions for integrating previous versions of the QuadPay widget.
Add Widget to PDP
- Login to your Shopify store.
- In the left menu, click Online Store
- For the theme you would like to edit, expand the Actions menu and choose Edit Code.
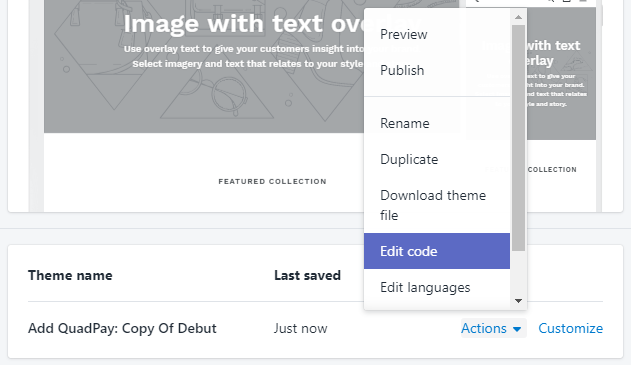
We recommend adding the QuadPay widget to a development theme or a copy of the currently live theme. This way you can control when you share the integration with your customers.
- In the Layout menu to the left, open theme.liquid.

- In the theme.liquid file, before the closing
</body>tag, insert this script which calls the QuadPay informational modal from each widget:
<!-- {% comment %} QuadPay: Older Browsers {% endcomment %} -->
<script src="https://unpkg.com/@webcomponents/webcomponentsjs@2.2.4/webcomponents-loader.js" type="application/javascript"></script>
<script defer nomodule src="https://widgets.quadpay.com/es5/quadpay-widget-2.2.5.js" type="application/javascript"></script>
<!-- {% comment %} QuadPay: Modern Browsers {% endcomment %} -->
<script async src="https://widgets.quadpay.com/quadpay-widget-2.2.5.js" type="application/javascript"></script>
Then Click Save.

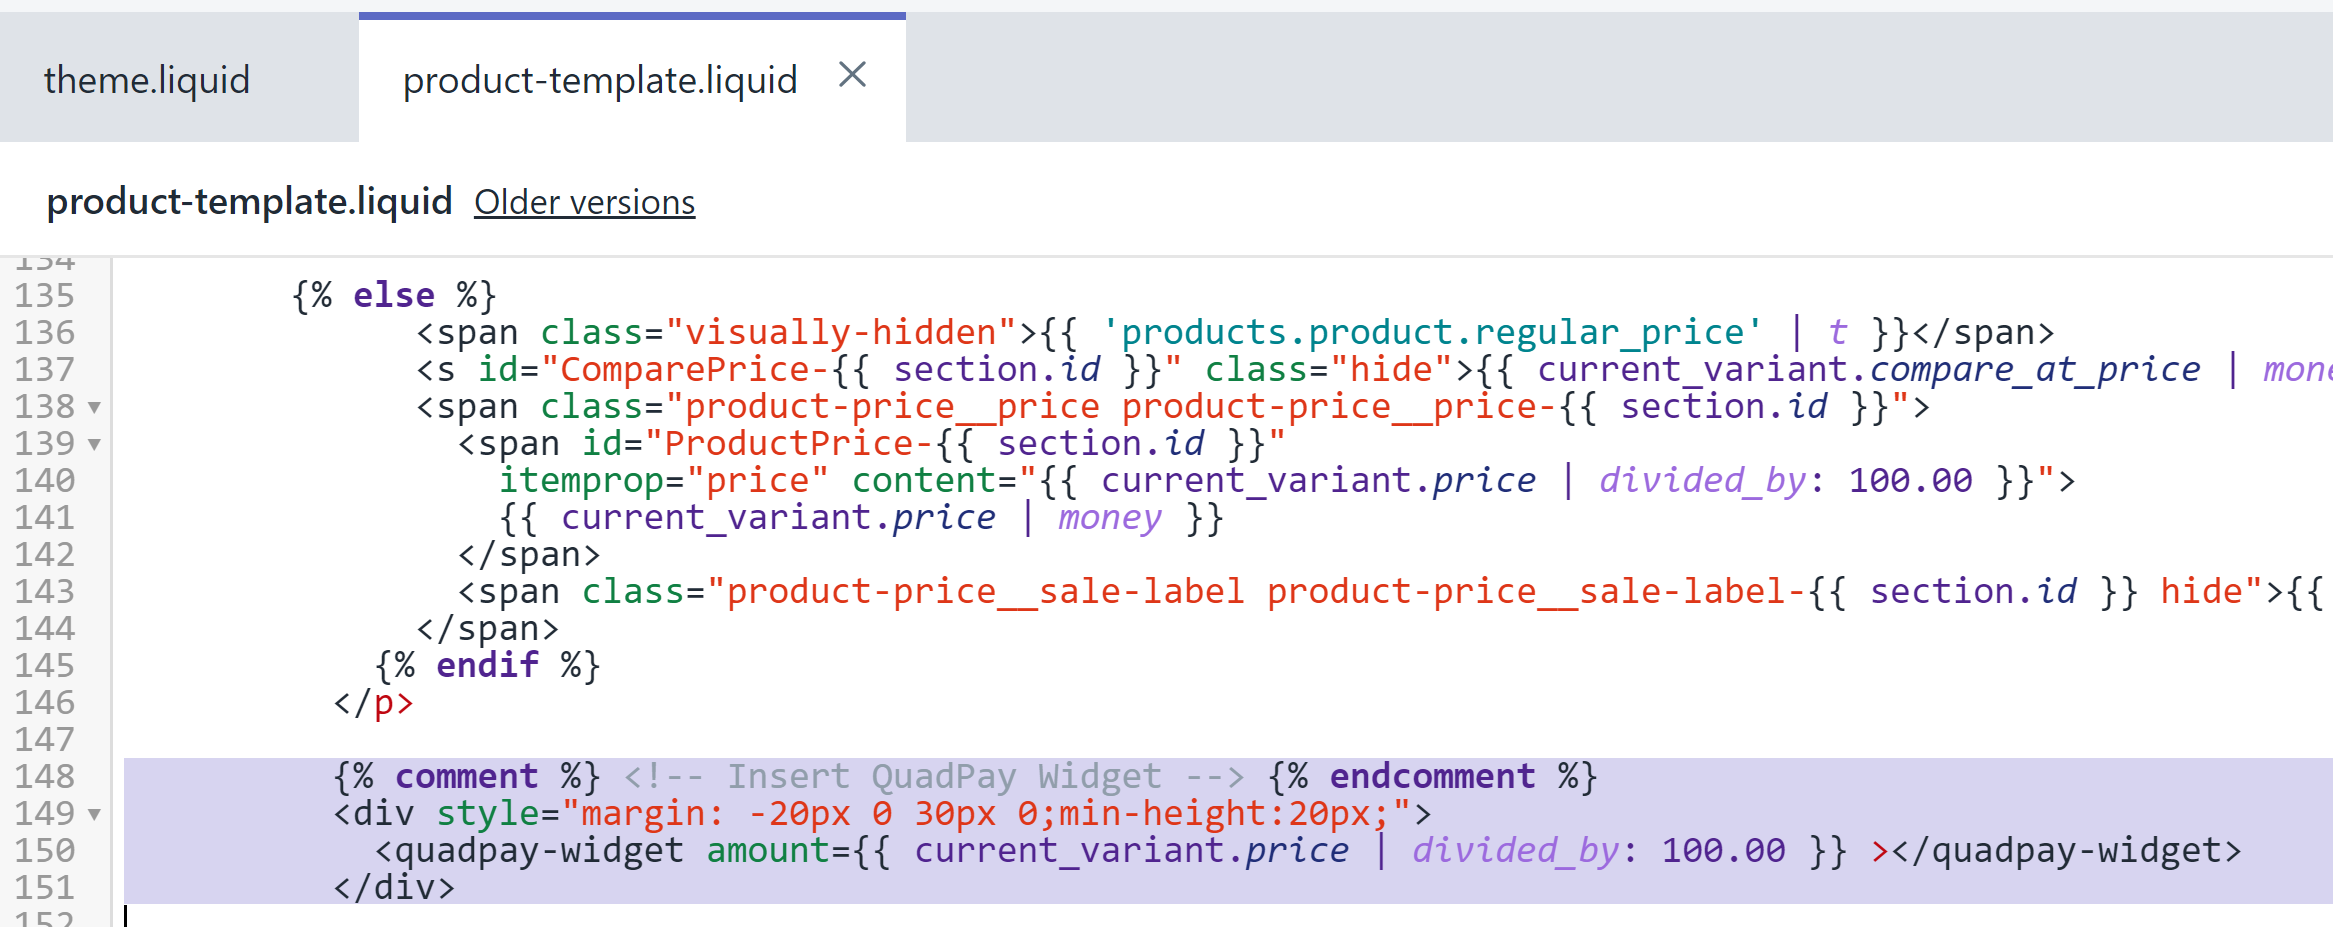
- Locate the Product Details Page template. Often this is in the Sections folder in the file product-template.liquid file. (If your theme is customized, the Product Details Page template may be in another file.) Inside the Product Details Page template, locate where the price is displayed. Then, right below the Product Price, paste in this snippet. Click Save.
{% comment %} <!-- Insert QuadPay Widget --> {% endcomment %}
<div style="margin: 0 0 10px 0; min-height: 20px;">
  <quadpay-widget amount={{ current_variant.price | divided_by: 100.00 }} ></quadpay-widget>
</div>
- Note the variable that is used to display the price. Paste this same price variable after
amount=in the above snippet. Shopify uses a variety of variables to indicate the product price, including:
Current_variant.priceVariant.priceProduct.priceProduct.selected_or_first_available_variant.price- If the price is displayed with a JavaScript variable, you may need to wrap the price variable in raw tags as follows:
{% raw %} {{{totalQPPrice}}} {% endraw %}
Note: If the above snippet always shows "4 interest-free payments on orders over ${min price} even when the price is above the minimum allowed price, the price variable after amount= needs to be replaced.
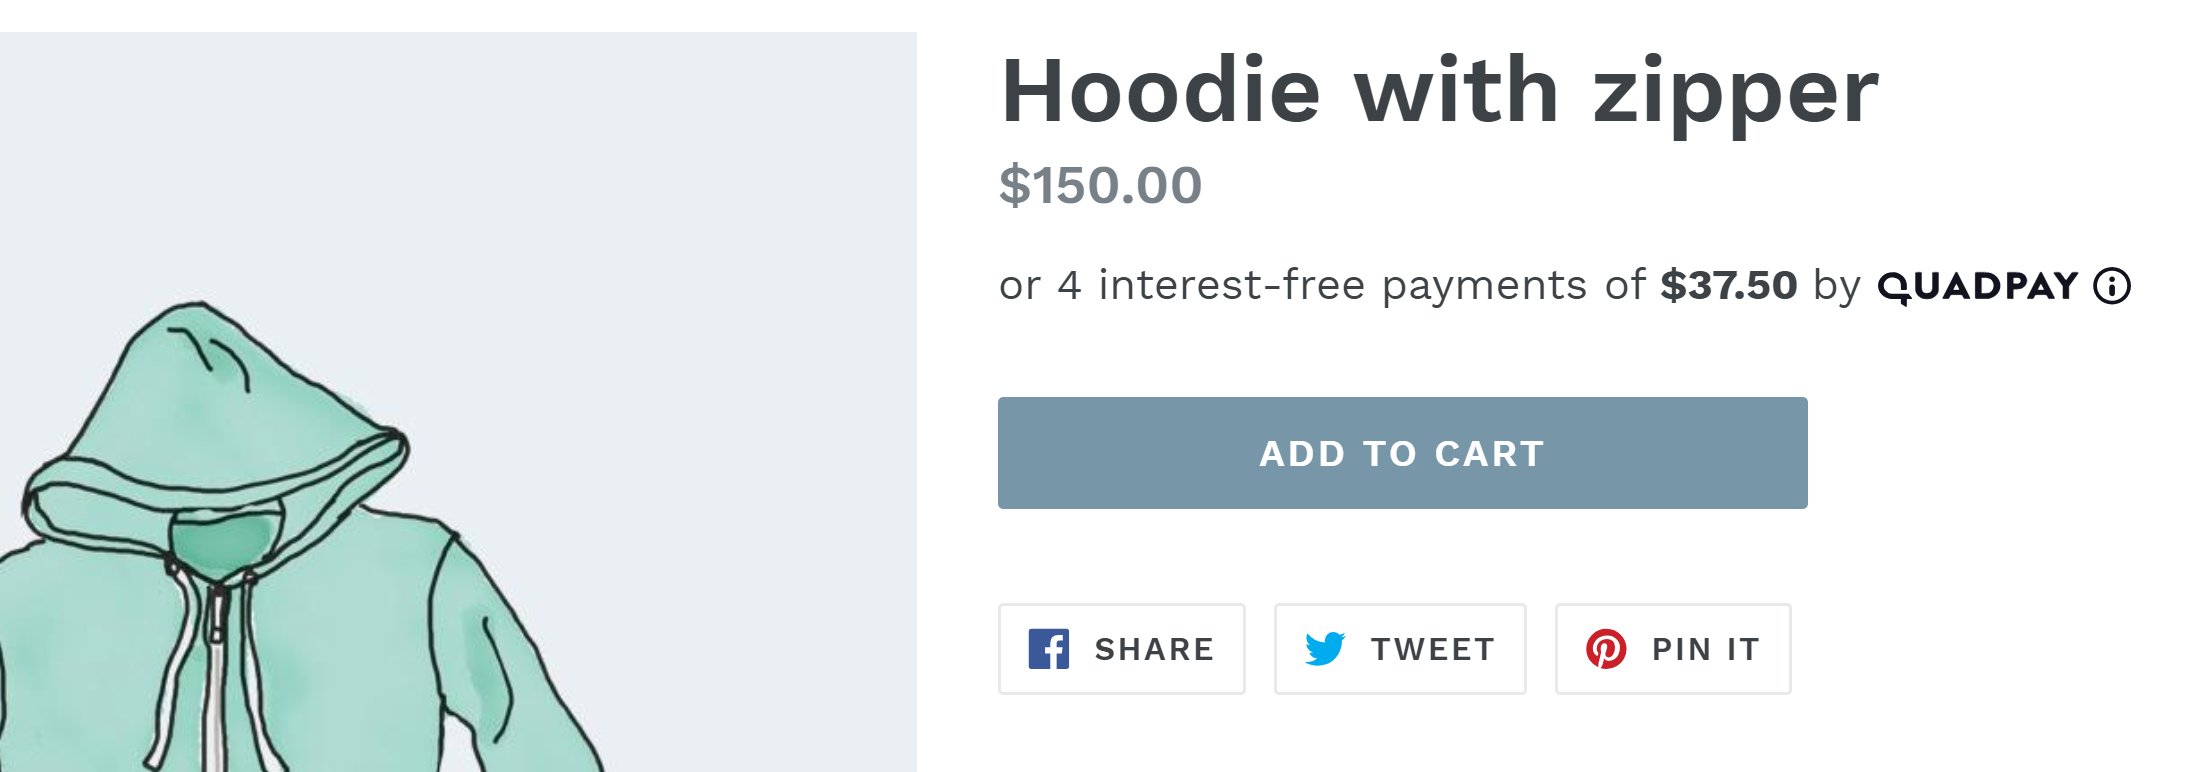
- Click the Preview link in the top menu to preview the QuadPay Widget in this theme.
Customizing the Styling of the QuadPay Widget
For guidance on customizing the styling of the widget, visit the QuadPay Widget Integration Guide.
Add Widget to Cart
After you have added the widget to the Product Details Page template, add the widget to the Cart template.
- Locate the Cart template. Often this is in the Sections folder in the file cart-template.liquid file. (If your theme is customized, the Cart template may be in another file.) Inside the Cart template, locate where the price is displayed. Then, right below the Cart Subtotal or Cart Total, paste in this snippet. Click Save.
{% comment %} <!-- Insert QuadPay Widget --> {% endcomment %}
<div style="margin: 0 0 10px 0;min-height:20px;">
  <quadpay-widget amount={{ cart.total_price | divided_by: 100.00 }} ></quadpay-widget>
</div>

-
Note the variable that is used to display the cart total. Paste this same cart total variable after
amount=in the above snippet. Shopify uses various variables to indicate the cart total, but typically the cart total variable is:cart.total_price
Note: If the above snippet always shows "4 interest-free payments on orders over${min price}even when the price is above the minimum allowed price, the cart total variable afteramount=needs to be updated. -
Click the Preview link in the top menu to preview the QuadPay Widget in this theme.

Customizing the Styling of the QuadPay Widget
For guidance on customizing the styling of the widget, visit the QuadPay Widget Integration Guide.
Add Widget to Mini Cart
If your site uses a Mini Cart, after you add the widget to the Product Details Page and Cart templates, add the widget to the Mini Cart.
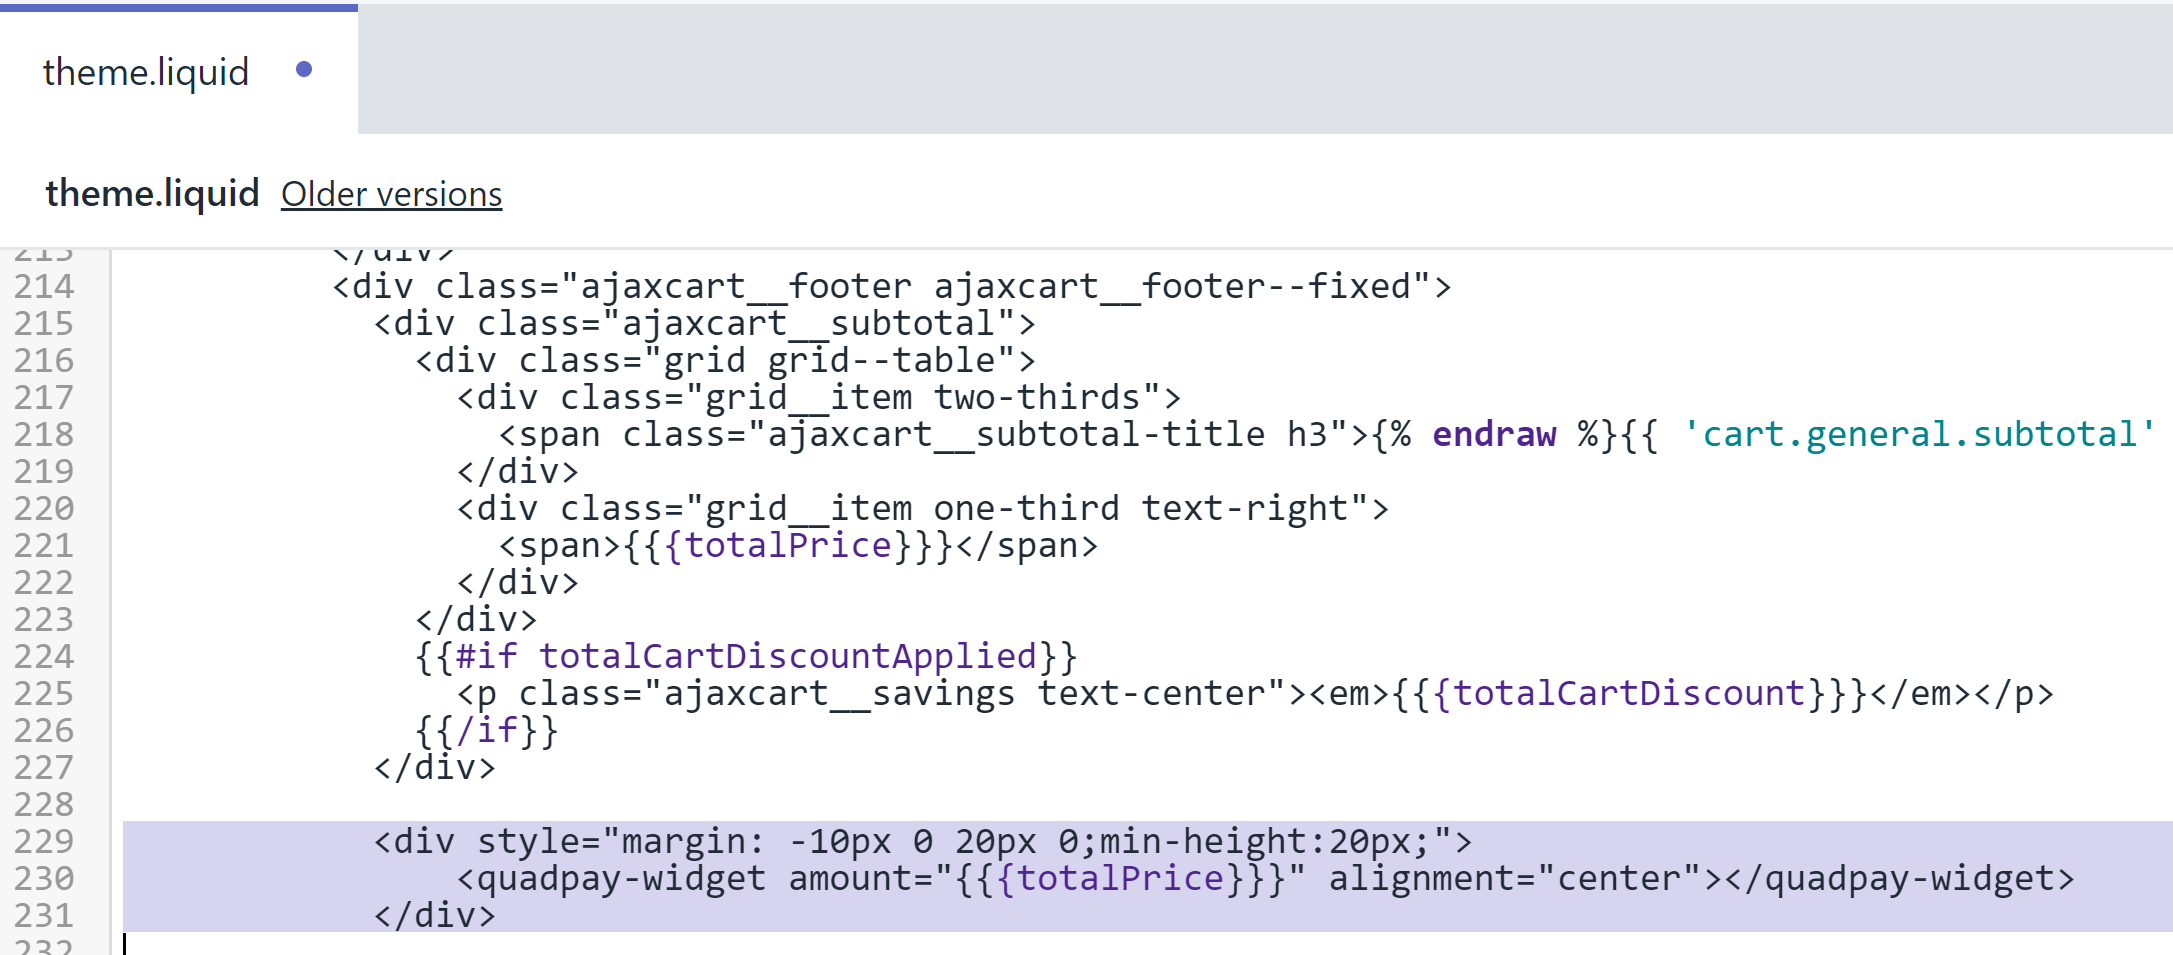
- Locate the Mini Cart template. Often this is handled in the Layout/theme.liquid file, but the mini cart is also frequently handled through separate JavaScript files in the Assets folder. Inside the Mini Cart file, locate where the price is displayed. Then, right below the Cart Subtotal or Cart Total, paste in this snippet. Click Save.
{% comment %} <!-- Insert QuadPay Widget --> {% endcomment %}
<div style="margin: 0 0 10px 0; min-height:20px;">
  <quadpay-widget amount="{{{totalPrice}}}" ></quadpay-widget>
</div>
-
Note the variable that is used to display the mini cart total. Paste this same variable after
amount=in the above snippet. Shopify uses various variables to indicate the cart total in the mini cart, but often the mini cart total variable is:cart.total_priceor{{{totalPrice}}}
Note: If the above snippet always shows "4 interest-free payments on orders over${min price}even when the price is above the minimum allowed price, the cart total variable afteramount=needs to be updated. -
Click the Preview link in the top menu to preview the QuadPay Widget in this theme.
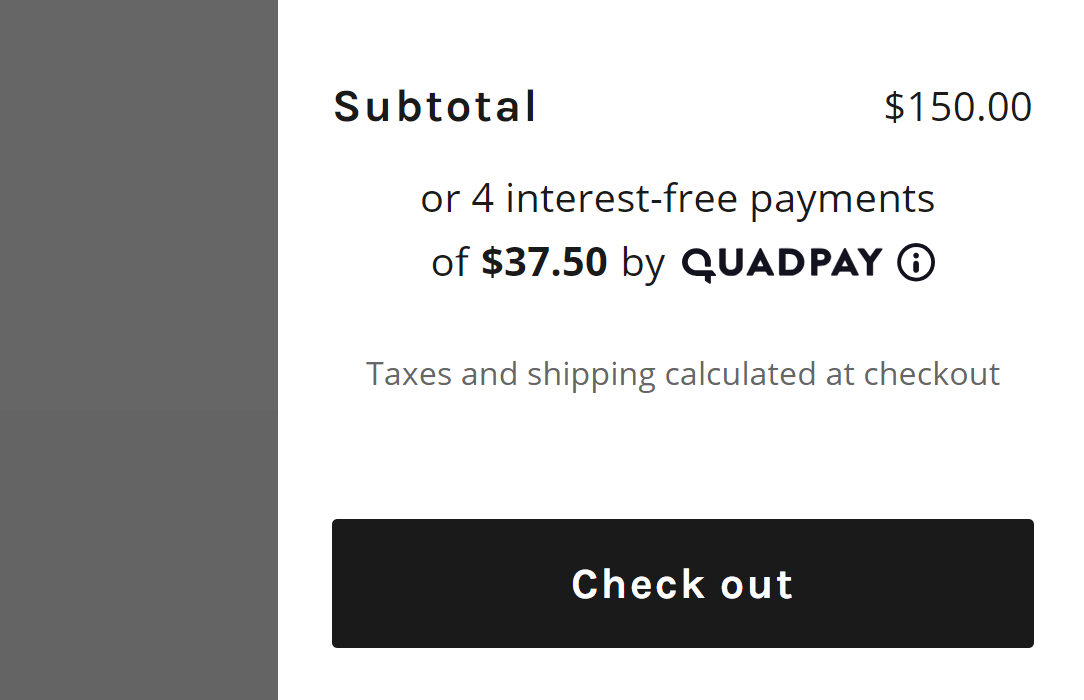
Sometimes, the Mini Cart is already quite customized and integrating the QuadPay widget requires additional customizing. If you would like support with adding the widget to the Mini Cart or for any questions please get in touch with us.
Updated over 5 years ago
Now that you've added the QuadPay gateway and integrated the QuadPay widget, be sure to follow these quality assurance steps and decide if customizing the widget is necessary.
