Payment Widget
The Zip Payment Widget allows customers to more easily visualize when payments will be due in the future and what amounts will be paid.
Before You Start
Use these instructions to integrate the Zip Payment Widget.
Highlights:
- Always get the latest updates: Merchants will always be on the most up-to-date version of the widget without having to make any code changes; this means new features will automatically become available to merchants who have integrated the new widget.
- Hosted from zip.js: The zip.js library offers a number of client-side tools for merchants, so now you only need one library for all of your Zip frontend needs.
- ADA compliance: Although this was present in some previous versions of our widgets, now it is available for all merchants using the new widgets.
- Internationalization for verbiage and currency: Internationalization allows for widget support across multiple languages. We also offer the ability to tie the widget language to the global language of the site, if available, by passing in an attribute. If not defined, the language used is the customer's default browser language. Read more here: languageSelector.
- Configuration-driven properties: Some properties of the widget can be pulled from merchant configuration by passing in the merchant ID.
- Installment amounts update dynamically: We offer the ability to use an attribute to dynamically update the installments when the price changes in checkout. This helps if a customer applies a promo code at checkout — the payment plan will update update automatically to show the new price without having to refresh the page. Read more here: amountSelector.
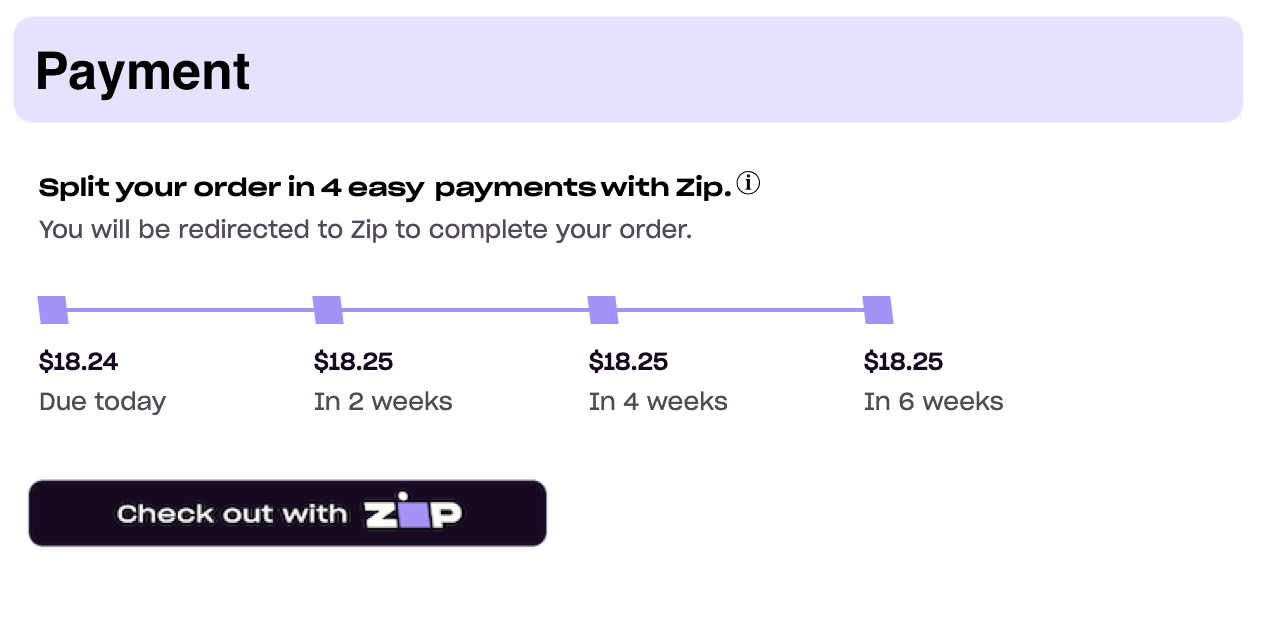
Example Payment Widget

Example Payment Widget at checkout
Please use the following steps to integrate the Payment Widget.
1. Enable display of the widget and modal
Paste this snippet which renders the Zip widget and informational modal in the store's theme or global file.
<!-- zip.js Library -->
<script src="https://cdn.us.zip.co/v1/zip.js"></script>
2. Place the widget
Paste this snippet where the Payment Widget should appear. We recommend placing it at checkout, above or below the "Checkout with Zip" button.
<!-- Insert Zip Payment Widget -->
<zip-payment-widget
       amount="360" merchantId="[Insert merchant Id]" >
</zip-payment-widget>
Attributes
Payment Widget
The following attributes can be used to configure the payment widget.
| Attribute name | Value type | Details |
|---|---|---|
| hideSubtitle | boolean | Hides the subtitle text, "You will be redirected to Zip to complete your order." |
| hideTimeline | boolean | Hides the payment timeline. |
| timelineColor | string | Set to "black" to show the timeline color in black. |
| isMFPPMerchant | boolean | Set to "true" if utilizing the Merchant Fee For Payment Plan structure. |
| learnMoreUrl | string | Optional URL link to be added in the information modal. |
| merchantId | string | A merchant unique ID provided by Zip. |
| size | percent value | Changes the font size of all lines of text. e.g. -90%, 120% |
Preview
Be sure to preview the widget at desktop and mobile screen widths.
Also, take note that the Zip informational modal appears when the user clicks on the Zip logo or information "i" link. To customize the styling of this modal, select the element by ID and add insert CSS styling accordingly.
> Change Timeline Color
The default timeline color is purple. Setting timelineColor="black" will change the timeline color to black.
<!-- Insert Payment Widget -->
<zip-payment-widget amount="100" timelineColor="black"></zip-payment-widget>

> Set If Utilizing Merchant Fee For Payment Plan
This value is set to "true" if you are utilizing the Merchant Fee For Payment Plan.
<!-- Insert Payment Widget -->
<zip-payment-widget amount="100" merchantId="[Insert merchant Id]" isMFPPMerchant="true"></zip-payment-widget>
> Add a Learn More URL to the Info Modal
An optional URL to pass in, to be included as a "learn more" link in the info modal. If no URL is passed, the text will not show in the modal. Please ensure the URL is formatted with https://in the beginning.
<!-- Insert Payment Widget -->
<zip-payment-widget amount="100" merchantId="[Insert merchant Id]" learnMoreURL="https://zip.co/us/how-it-works"></zip-payment-widget>
> Add Merchant ID
You can find your Merchant ID in the Merchant Portal, in the Settings tab.
<!-- Insert Payment Widget -->
<zip-payment-widget amount="100" merchantId="[Insert merchant Id]"></zip-payment-widget>
> Adjust Text Size
To increase or decrease the size of the text inside the widget, add size="{PERCENTAGE}" to the zip-payment-widget tag.
<!-- Insert Payment Widget -->
<zip-payment-widget amount="100" merchantId="[Insert merchant Id]" size="110%"></zip-payment-widget
Combine Customizations
Many customizations can be included in the quadpay-widget tag.
<!-- Insert Payment Widget -->
  <zip-payment-widget amount="100"
                      size="110%"
                      merchantId="44444444-4444-4444-4444-444444444444">
  </zip-payment-widget>
Advanced Customizations
If you would like to talk about more advanced customizations or have any questions, please email our Integrations Team.
Updated 2 months ago